Appearance
如何集成Asp.net Core的Controller和RazorPage
如果做过 Asp.net Core开发,对 Controller (控制器)和 Razor Page 一定很熟悉。由于活字格服务器是用 Asp.net Core 开发的。所以同样也可以集成 Asp.net Core 的 Controller 和 Razor Page。
首先,请参考开发自定义中间件章节,注册MyPlugin.Server 工程到插件中。
集成Controller
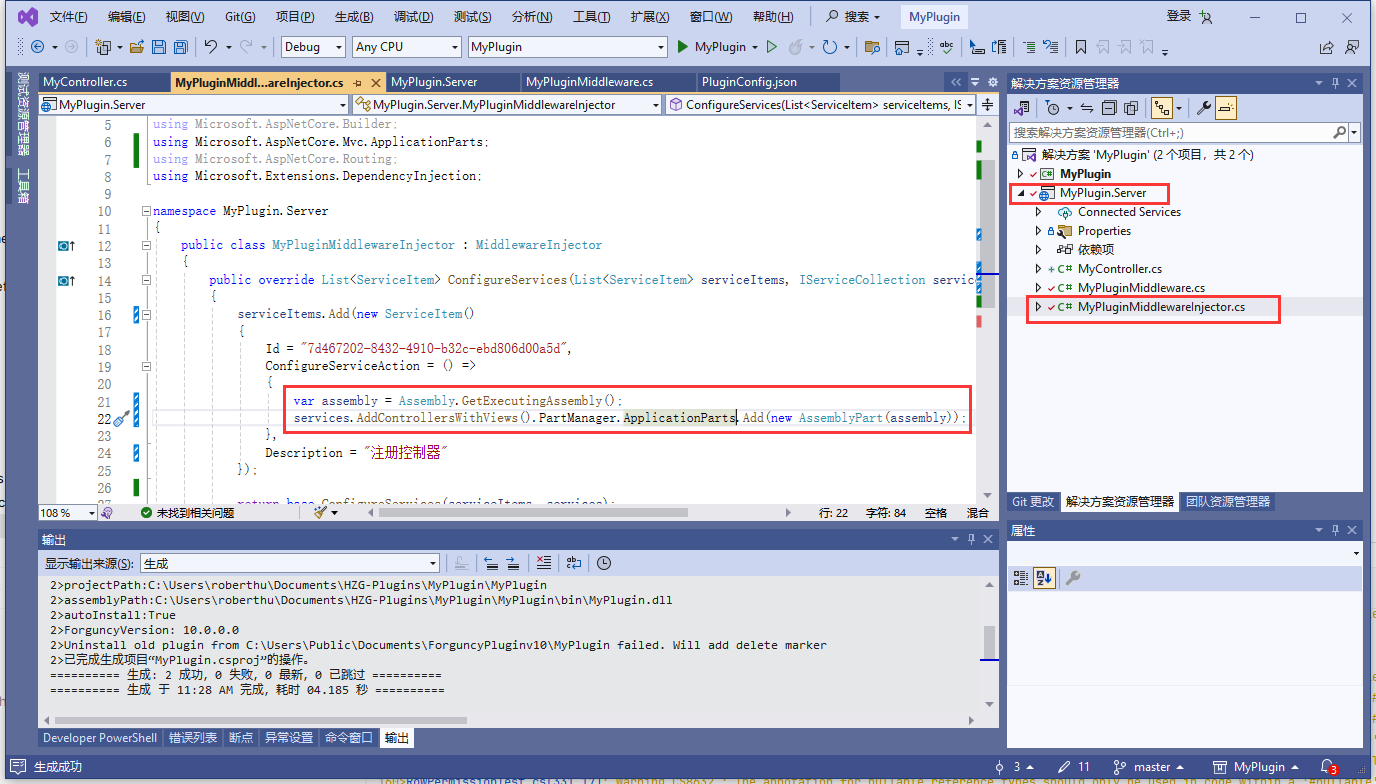
编辑 MyPluginMiddlewareInjector.cs 方法。修改 ConfigureServices 方法如下:
csharp
        public override List<ServiceItem> ConfigureServices(List<ServiceItem> serviceItems, IServiceCollection services)
        {
            serviceItems.Add(new ServiceItem()
            {
                Id = "7d467202-8432-4910-b32c-ebd806d00a5d",
                ConfigureServiceAction = () =>
                {
                    var assembly = Assembly.GetExecutingAssembly();

                    // 注册控制器
                    services.AddControllersWithViews().PartManager.ApplicationParts.Add(new AssemblyPart(assembly));
                },
                Description = "注册控制器"
            });

            return base.ConfigureServices(serviceItems, services);
        }
services.AddControllersWithViews().PartManager.ApplicationParts 代码可以让 Asp.net Core 通过反射查找当前程序集中的 Controller
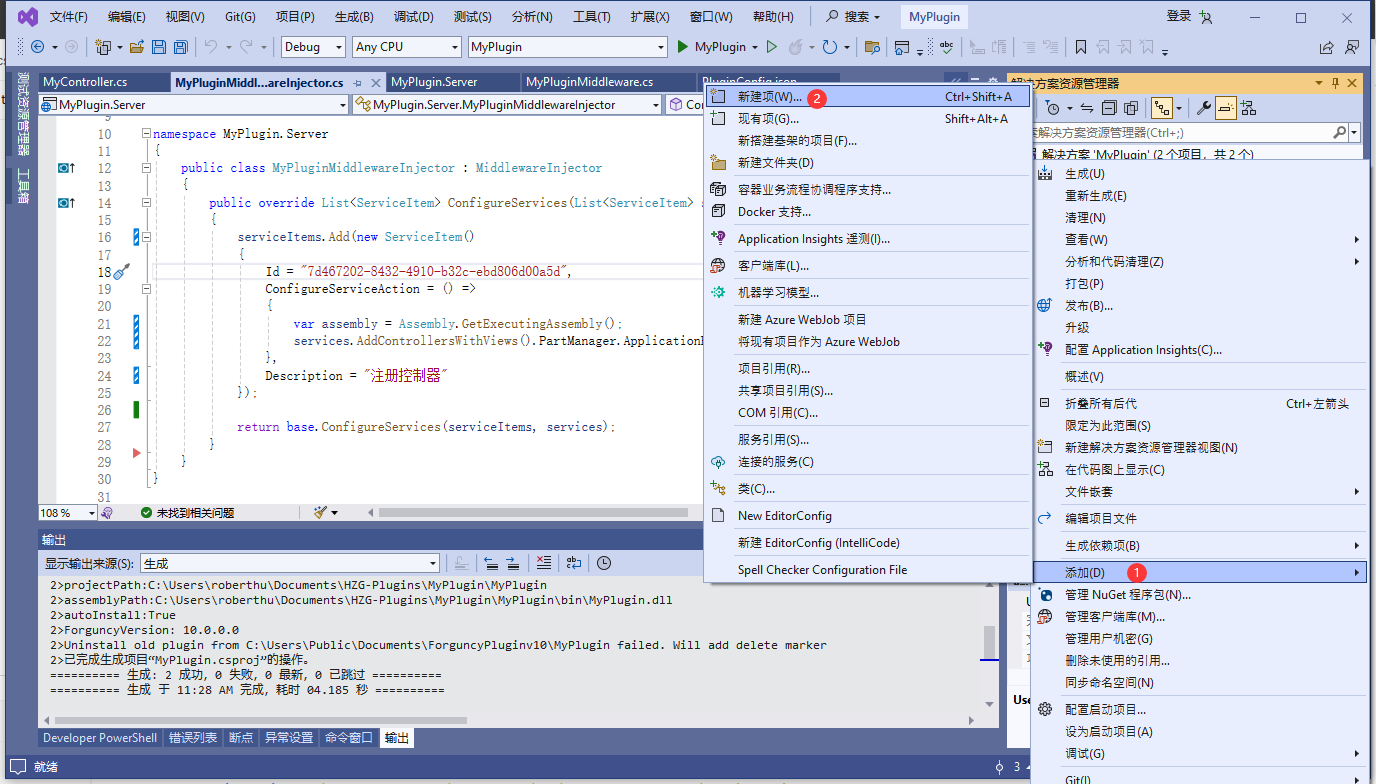
之后,添加控制器即可
右键点击 MyPlugin.Server 工程,点击 添加->新项目
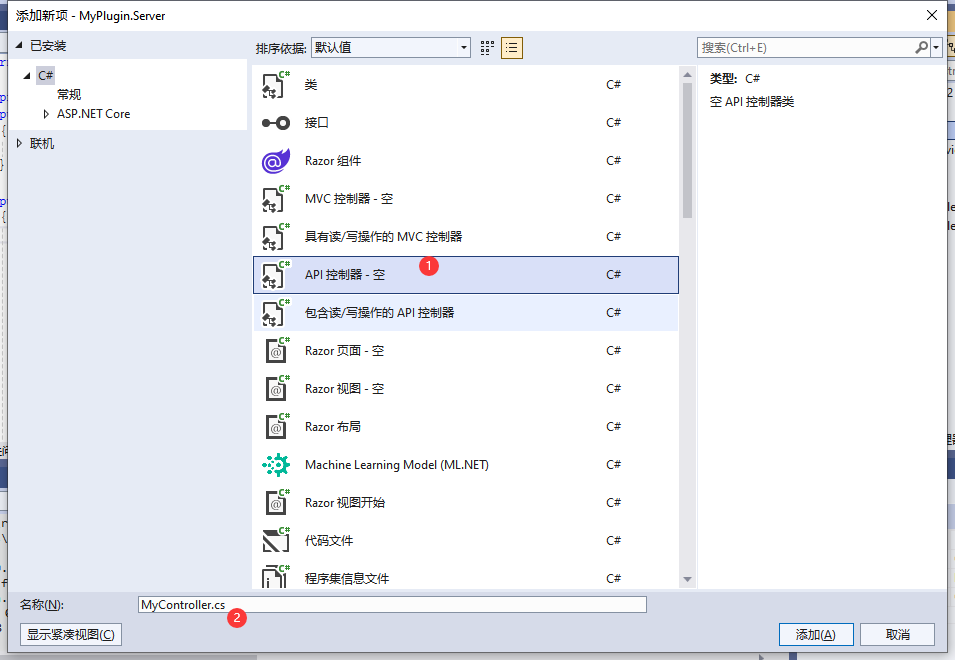
选择 API 控制器-空
给 MyController 添加一个 Action
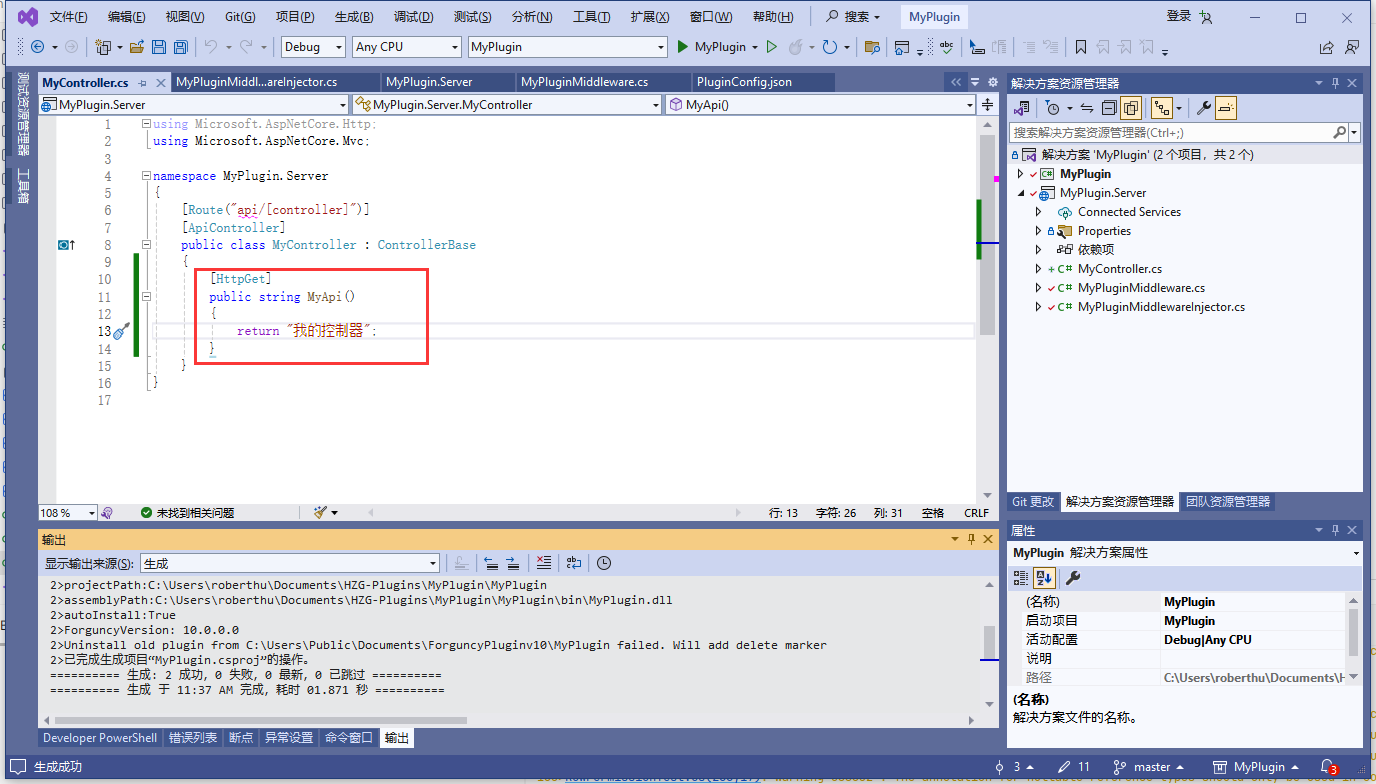
测试代码

之所以用 api/My 访问是因为默认的路由设置 [Route("api/[controller]")]
api 为前缀, My 为控制器的名称。可以通过修改路由配置来控制其他路由方式,注意,不要和活字格的默认路由冲突。
集成 Razor Page
集成 Razor Page 的方式和集成 Controller类似
首先,相对于集成 Controller ,集成 Razor Page 需要额外添加一句 services.AddRazorPages().PartManager.ApplicationParts.Add(new CompiledRazorAssemblyPart(assembly));
代码如下
csharp
        public override List<ServiceItem> ConfigureServices(List<ServiceItem> serviceItems, IServiceCollection services)
        {
            serviceItems.Add(new ServiceItem()
            {
                Id = "7d467202-8432-4910-b32c-ebd806d00a5d",
                ConfigureServiceAction = () =>
                {
                    var assembly = Assembly.GetExecutingAssembly();

                    // 注册控制器
                    services.AddControllersWithViews().PartManager.ApplicationParts.Add(new AssemblyPart(assembly));

                    // 注册 Razor Page
                    services.AddRazorPages().PartManager.ApplicationParts.Add(new CompiledRazorAssemblyPart(assembly));
                },
                Description = "注册控制器"
            });

            return base.ConfigureServices(serviceItems, services);
        }
修改之后就可以添加 Razor Page 了
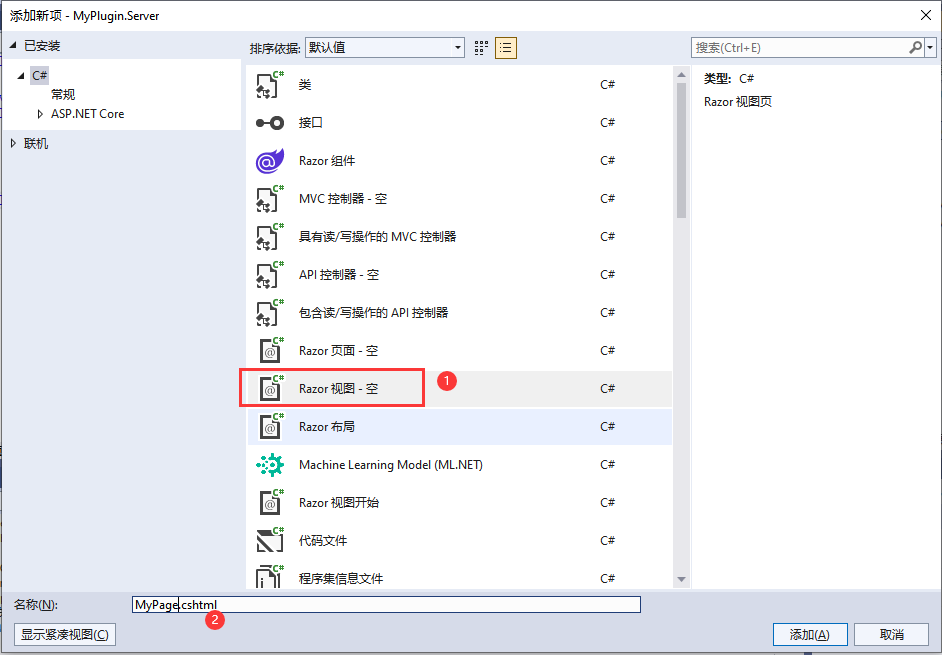
通过 右键点击 MyPlugin.Server 工程,点击 添加->新项目 选择添加Razor视图-空
添加之后,修改Razor页面的内容
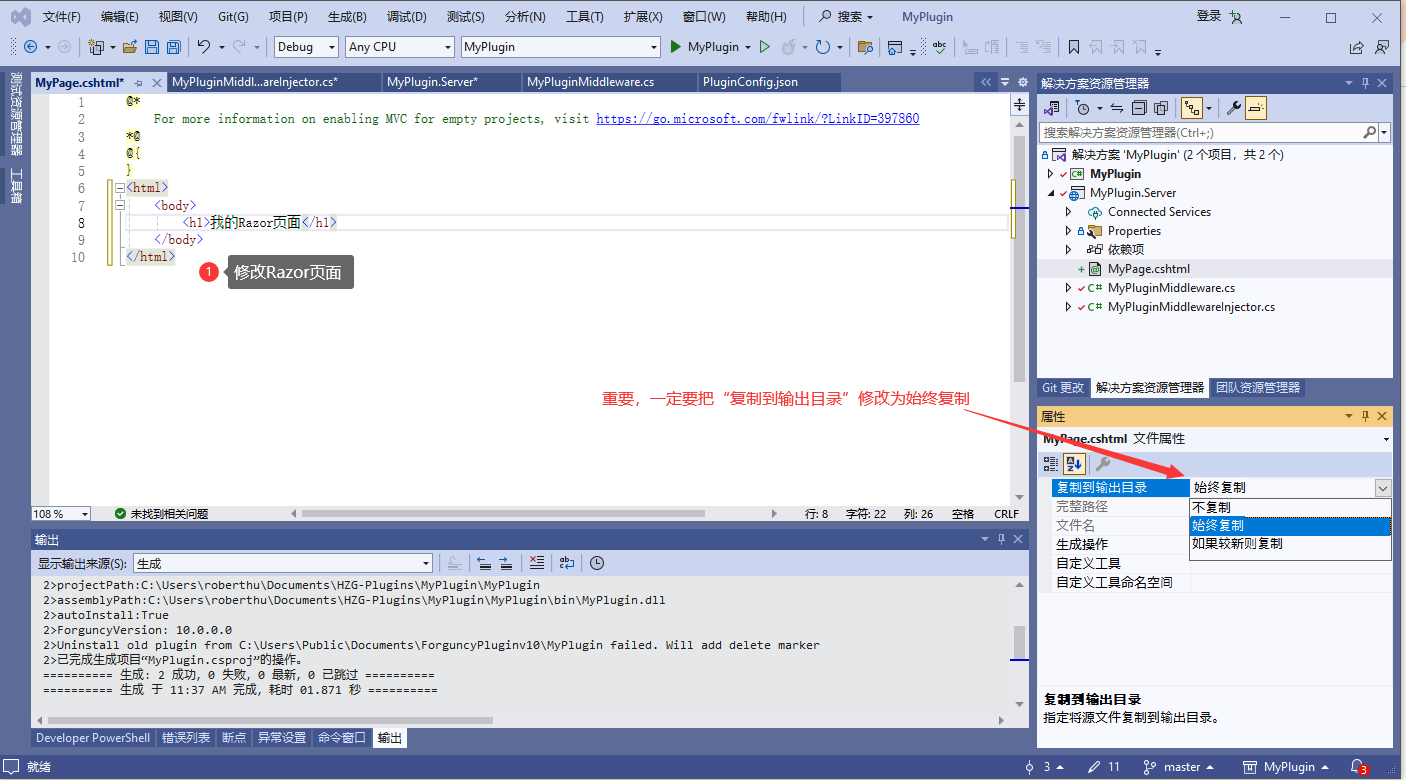
WARNING
注意,一定要修改 MyPage.cshtml 的“复制到输出目录”属性修改为“始终复制”否则插件产出物中不会包含 MyPage.cshtml 文件。
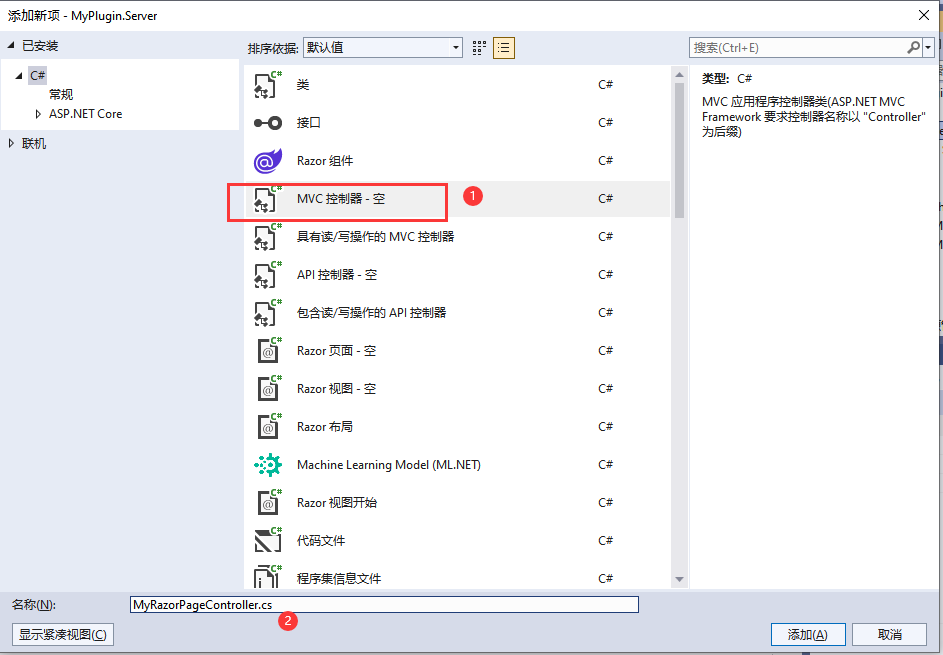
通过 右键点击 MyPlugin.Server 工程,点击 添加->新项目 选择添加 MVC控制器-空
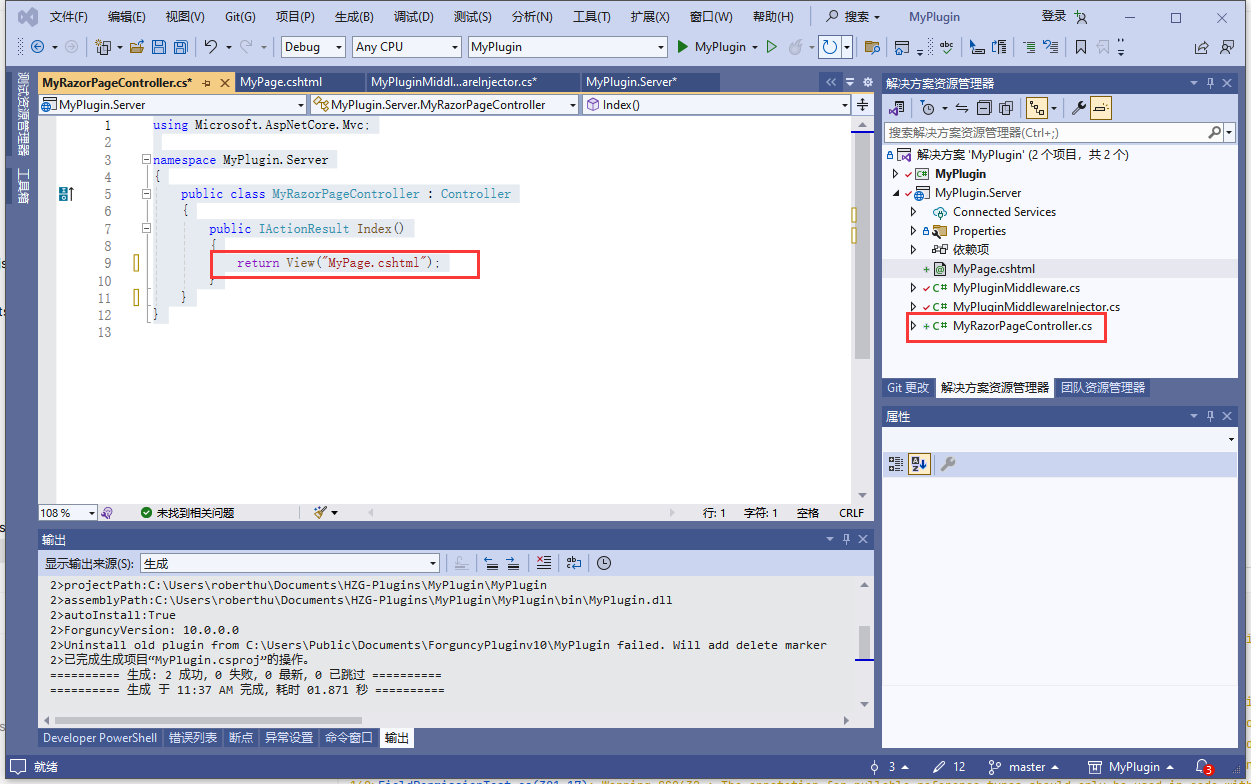
修改 Index 方法,让 MvcController 和 MyPage.cshtml 关联
csharp
using Microsoft.AspNetCore.Mvc;

namespace MyPlugin.Server
{
    public class MyRazorPageController : Controller
    {
        public IActionResult Index()
        {
            return View("MyPage.cshtml");
        }
    }
}
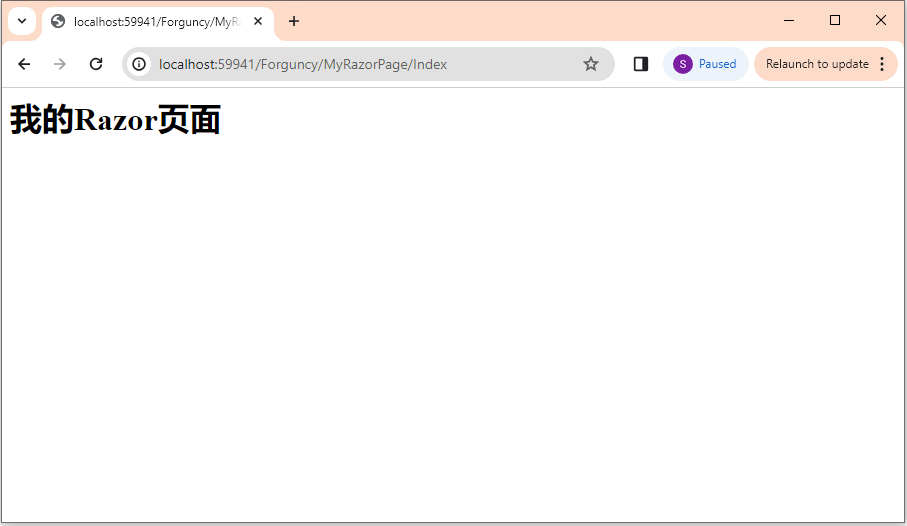
运行查看效果
默认的路由是 Controller/Action,可以通过添加 [Route] 来配置自定义路由。注意,不要和活字格的默认路由冲突。
给 Razor Page 添加 Model
上例中添加了 Razor Page,但是没有添加 Model ,这样就只能显示一个静态页面。通常 Razor Page 通过绑定一个Model来实现动态页面的服务端渲染。以下代码演示了如何给Razor页面添加 PageModel
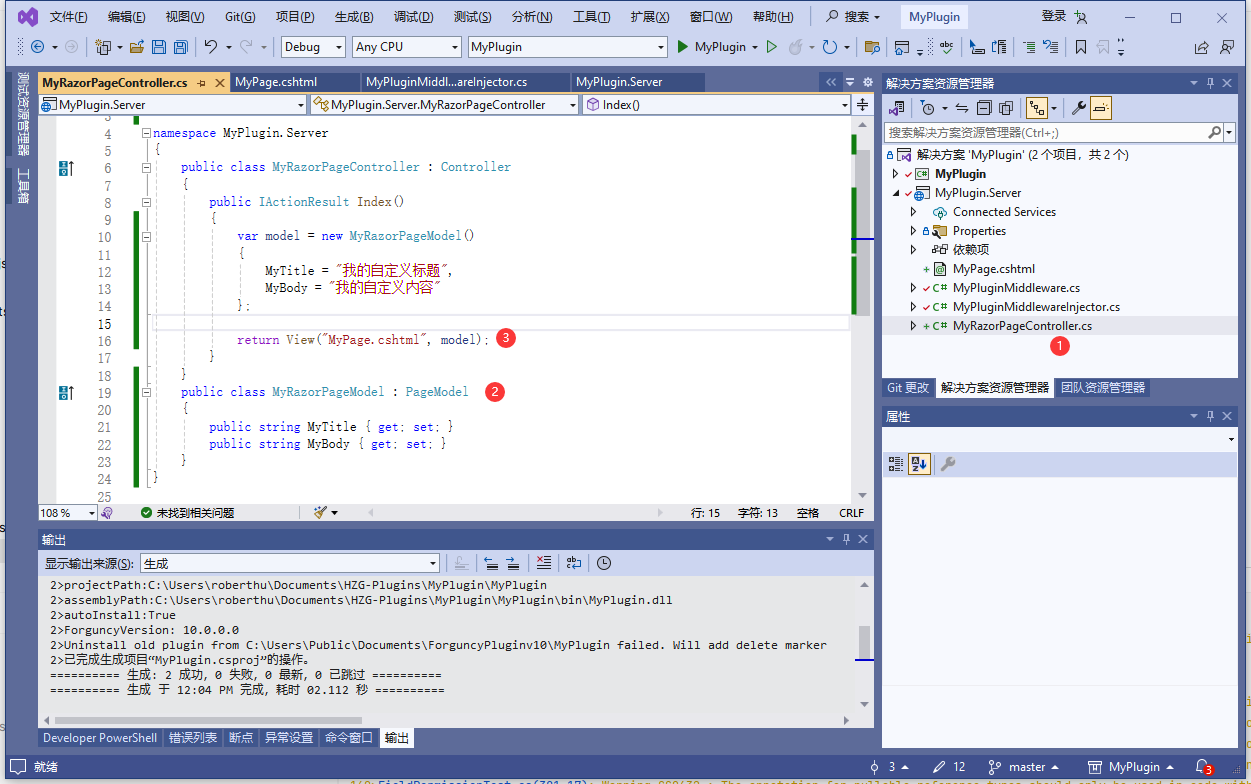
首先修改 MyRazorPageController.cs 文件如下
csharp
using Microsoft.AspNetCore.Mvc;
using Microsoft.AspNetCore.Mvc.RazorPages;

namespace MyPlugin.Server
{
    public class MyRazorPageController : Controller
    {
        public IActionResult Index()
        {
            var model = new MyRazorPageModel()
            {
                MyTitle = "我的自定义标题",
                MyBody = "我的自定义内容"
            };

            return View("MyPage.cshtml", model);
        }
    }
    public class MyRazorPageModel : PageModel
    {
        public string MyTitle { get; set; }
        public string MyBody { get; set; }
    }
}
代码说明
- 代码 MyRazorPageController.cs 文件
- 定义 MyRazorPageModel 类从 RageModel 派生
- 通过 View 方法的第二个参数设置 model 把 MyPage.cshtml 和 MyRazorPageModel 的实例绑定
之后修改 MyPage.cshtml 中的代码
html
@using MyPlugin.Server
@model MyRazorPageModel
@{
}
<html>
    <head>
        <title>@Model.MyTitle</title>
    </head>
    <body>
        <h1>我的Razor页面</h1>
    </body>
</html>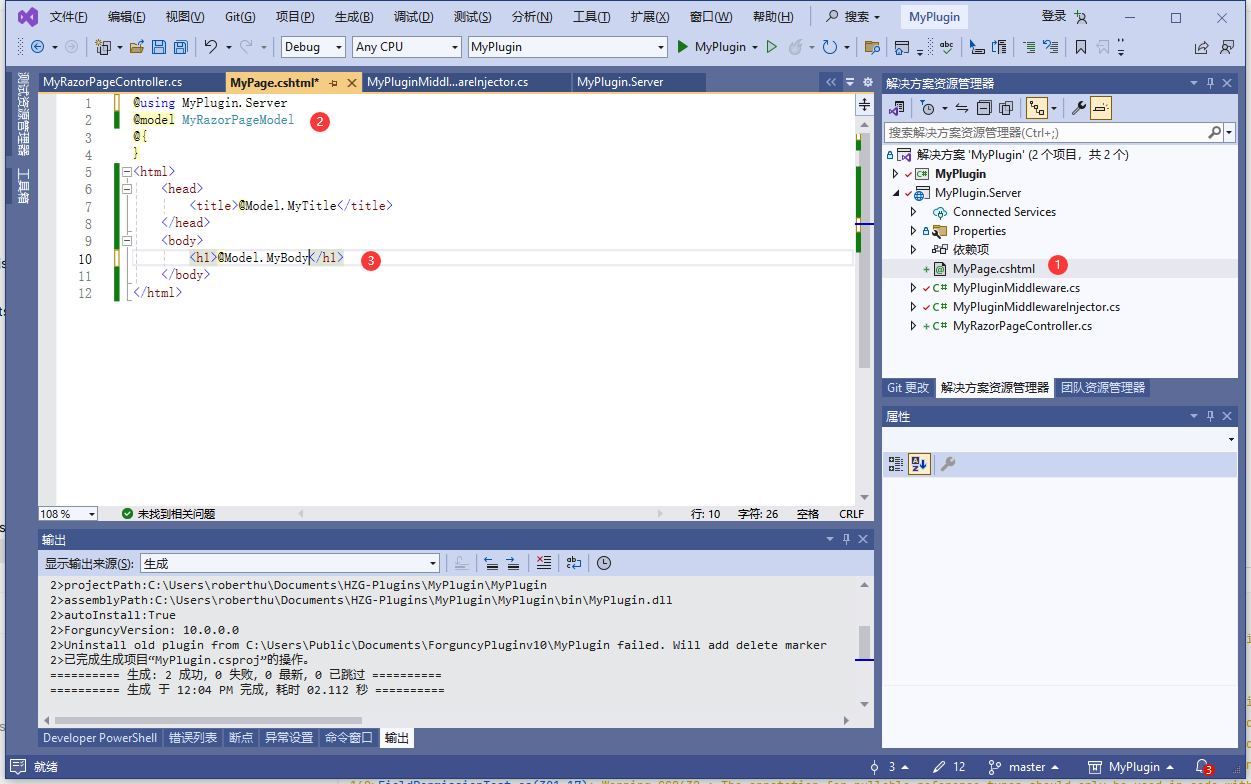
代码说明
- 打开 MyPage.cshtml 文件
- 声明页面的 Model 类型为 MyRazorPageModel
- 在 cshtml 代码中通过 @Model.MyBody 使用 Model 中的属性
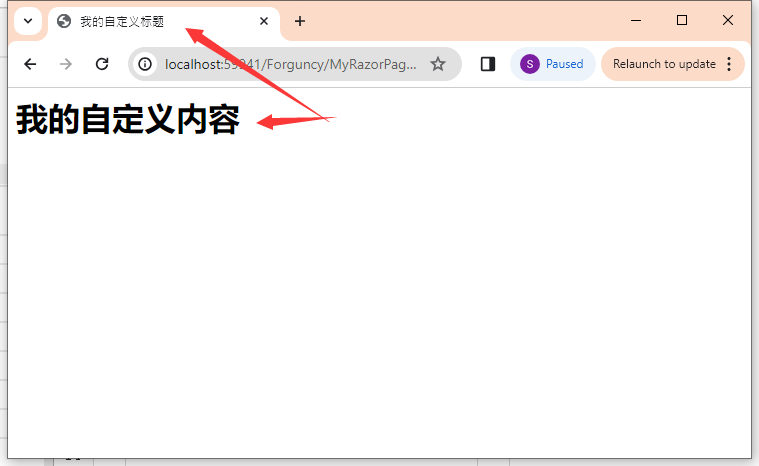
运行时效果
更新: 2024-03-11 12:14:36
原文: https://www.yuque.com/robert-bh51n/ea8l6c/kdk1rys19ucympcg